How to Put Player Back to Normal Sizw With Resize Mod Gmod
In GMOD, you can use Developer Console for execute Commandsand have Fun too with sv_cheats 1.
So, here i'm going to show you some developer console Commands in GMOD
(And Some of them Need sv_cheats 1 for Work!)
- sv_cheats 1 - Enables cheats on the server.
- buddha - Makes you survive if your health reaches on 1.
- noclip - Makes you fly around on the map. (Is the same effect If you press V [By Default] on sandbox.)
- thirdperson - Enables the Third Person camera. (It makes your camera on your back.)
- firstperson - Enables the First Person camera. (It resets the camera to normal if you use thirdperson.)
Well, That was SOME commands that can have in Source Engine games.
Now, Time to show some POSSIBLE entities on Gmod.
- ent_create weapon_alyxgun - Creates a Alyx's Gun on the map.
- ent_create weapon_357 - Creates a 357 weapon on the map.
- ent_create weapon_stunstick - Creates a Stun Stick weapon on the map.
- ent_create weapon_crowbar - Creates a Crowbar weapon on the map.
- ent_create weapon_physcannon - Creates a Gravity Gun on the map.
- ent_create weapon_crossbow - Creates a Crossbow on the map.
- ent_create weapon_bugbait - Creates a Bug Bait on the map.
- ent_create weapon_smg1 - Creates a SMG on the map.
- ent_create weapon_striderbuster - Creates a Strider Buster on the map. (BUT i think it need Half-Life: Episode Two to work.)
- ent_create weapon_shotgun - Creates a Shotgun on the map.
- ent_create weapon_rpg - Creates a RPG on the map.
- ent_create weapon_pistol - Creates a Pistol on the map.
- ent_create weapon_frag - Creates a Grenade on the map.
- ent_create weapon_ar2 - Creates a AR2 on the map.
- ent_create weapon_annabelle - Creates a Annabelle on the map.
Now, Some GMOD Commands.
- sv_kickerrornum 0 - Disables kicking for lua errors.
- sv_unlag 0 - Disables lag compesation.
- sv_password - Sets the password of the server.
- npc_create <NPCclassname> - Create the NPC matching <classname> at the point you're looking at, if it can fit in the space. (For example: npc_create npc_combine_s)
Now, point_viewcontrol.
point_viewcontrol?, Lemme Explain.
point_viewcontrol is a point entity available in all Source games. It is a camera entity that controls the player's view. While it's active, the player will see out of the camera.
In code it is represented by classCTriggerCamera, defined intriggers.cpp.
![]() Bug:
Bug:
This class appears to have some problems. Please see its discussion page for notes.
For Example:- ent_create point_viewcontrol fov 80 target path01 wait 10 moveto path02 speed 10 targetname testingviewcontrol01 - Creates a point_viewcontrol.
- ent_fire testingviewcontrol01 Enable - Enables the point_viewcontrol.
BUT WAIT!!
You need to create path_track for make the Command work!
path_track?, Lemme Explain.
path_track is a point entity available in all Source games. It is used to build paths for other entities to follow. Eachpath_track is a node on the path, each holding the name of the nextpath_track in the path.
For Example:- ent_create path_track targetname path01 - Creates a path_track with
targetnamepath01.
Then look somewhere then do:
- ent_create path_track targetname path02 - Creates a path_track with
targetnamepath02.
Then Done!
Now, env_flare.
env_flare?, Lemme Explain.
Creates a red flare. Useful for creating a dark environment with just enough light to navigate. The flickering red light of the flare creates a tense atmosphere and a strong feeling of fight-or-die, as it's mainly used in HL2 only by the Combine.
In code it is represented by class CFlare, defined in hl2_dll\weapon_flaregun.cpp.
![]() Note:This entity is derived from CBaseCombatCharacter and can have relationships defined towards it.
Note:This entity is derived from CBaseCombatCharacter and can have relationships defined towards it.
![]() Tip:See the beginning ofd2_prison_08 for an example of its use.
Tip:See the beginning ofd2_prison_08 for an example of its use.
- ent_create env_flare targetname flare01 scale 10 duration 5 - Creates a env_flare.
Here how it looks like in-game.
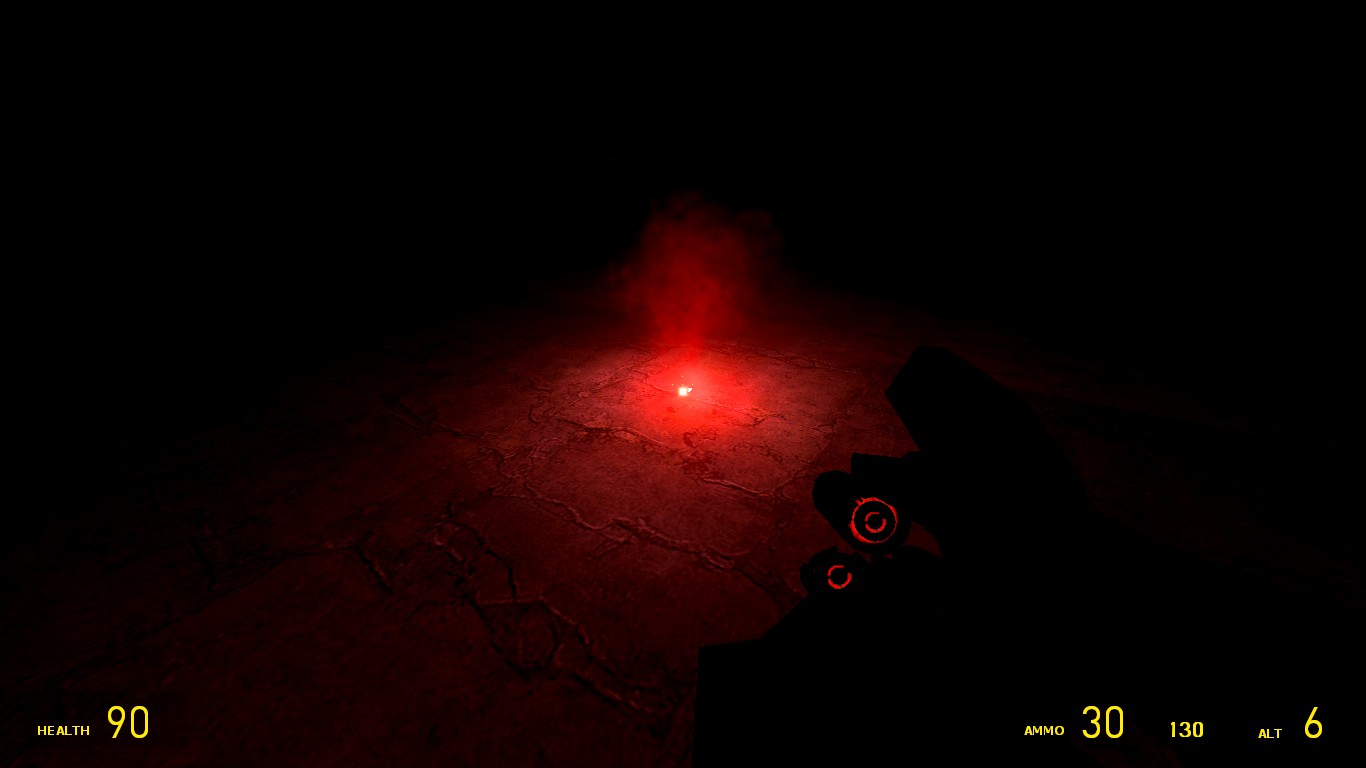
A env_flare in action.
env_flare's Keyvalues, Inputs, Flags and Outputs.
Keyvalues
Targetname:Parentname:Angles:- Scale
<float> - Size of the light signal.
- Duration
<float> - Active time of the entity.
Flags
- 1 : No DLight
- 2 : No Smoke
- 4 : Infinite
- 8 : Start off
Inputs
Targetname:Parentname:-
Start<float> - Starts the flare Emitting Smoke and light.
-
Die<float> - Removes the flare.
-
Launch<float> - Launch the flare forward with the specified speed.
Outputs
Targetname:-
OnUser1toOnUser4 - These Outputs each fire in response to the firing of the like-numbered
FireUser1toFireUser4Input; see User Inputs and Outputs. -
OnKilled
- This Output fires when the entity is killed and removed from the game.
Now, env_laser.
env_laser?, Lemme Explain.
It creates a laser beam between itself and a given target. It is somewhat similar to env_beam and not to be confused with env_portal_laser. If you are wondering why your env_laser entity doesn't damage you, first make sure that the "damage per second" value is not set to zero then you have to make sure that the centerpoint of the env laser in hammer is not inside a brush also make sure that the center of the env_laser is not on the edge of a brush in both those cases the damage is negated by the brushes.
To move a brush / entity very slightly so the center point doesn't intersect with the side of a wall anymore use "<ctrl> M" quick-key for hammer it opens up a small window. Click on Move!!!!! -and then click on the desired direction x y or z then fill in a value of either 0.01 or -0.01 to place the brush slightly off the grid by only a fraction... If you are still planning on moving these brushes afterwards do this when your map is finished because if you move these entities together with other parts of your map they might all get off the grid which isn't good for optimization.
If your env_laser doesn't have a targetname the "start on" flag doesn't have to be set since it starts automatically. If the env_laser does have a targetname you do need the "start on" flag if you want it to start when the map spawns.
![]() In code, it is represented by class
In code, it is represented by classCEnvLaser, defined inEnvLaser.cpp.
For Example:
- ent_create env_laser targetname laser01 width 5 texture sprites/laserbeam.spr renderamt 255 rendercolor "255 255 255" - Creates a env_laser.
Here how it looks like in-game.
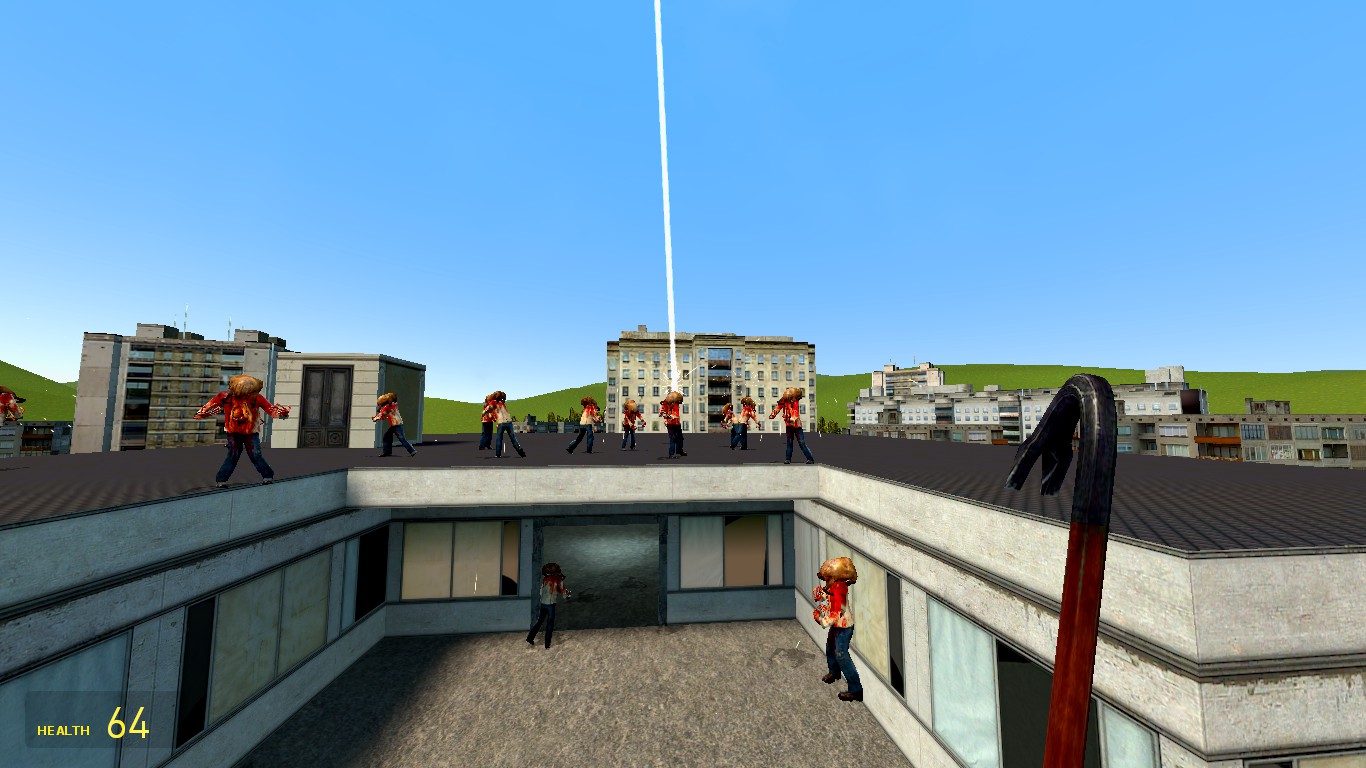
A env_laser in action. It can target entities like npc_zombie for example.
env_laser's Keyvalues:
- Target of Laser (LaserTarget)
<targetname> - Name of entity, or entities, to strike at. The target is randomly chosen if there are multiple entities matching the given name.
- Brightness (1 - 255) (renderamt)
<integer> - Beam brightness.
- Beam Color (R G B) (rendercolor)
<color255> - Beam color.
- Width of Beam
<float> - The width of the laser beam, in pixels.
- Amount of noise (0-255 (NoiseAmplitude)
<integer> - The amount of noise in the beam. 0 is a perfectly straight beam.
- Sprite Name (texture)
<sprite> - The material used to draw the laser beam.
- End Sprite (endsprite)
<sprite> - If specified, this sprite will be drawn at the end of the laser beam.
- Texture Scroll Rate (0-100) (texturescroll)
<integer> - Rate at which the beam texture should scroll along the beam.
- Starting Frame (framestart)
<integer> - The frame to start the beam texture on.
- Damage / second
<string> - How much damage this laser does. per second. to things it hits.
- Dissolve Type (dissolvetype)
<choices> - Dissolve effect type.
-
- -1 : None
- 0 : Energy
- 1 : Heavy electrical
- 2 : Light electrical
env_laser's Flags:
- 1 : Start On
- 16 : StartSparks
- 32 : EndSparks
- 64 : Decal End
Now,
func_reflective_glass.func_reflective_glass?, Lemme Explain.
It is used to produce perfectly reflective glass that renders world + entities. You must use a reflectiveglass texture (glass/reflectiveglass001.vmt is a good start) on one side of the brush, and the rest of the sides either nodraw or some other opaque texture for this to work properly.
![]() Note:This entity will not show a player their own reflection, however it will render other players.
Note:This entity will not show a player their own reflection, however it will render other players.
![]() Bug:
Bug:
This entity will cease to render or cause visual artifacts if water and or portals are in a visible visleaf.
![]() Bug:
Bug:
If more than one face of this brush entity contains a reflective or translucent texture, then the mirror's behavior will suddenly switch depending on one's perspective. To prevent this, make sureexactly one surface has the reflective texture. All others must be opaque.
For Example:- ent_create func_reflective_glass model *6 targetname refle01 - Creates a func_reflective_glass with model *6
BUT..
It only works with brushes that have reflective glass texture!
Here how it looks like in-game.

A func_reflective_glass in action. gm_construct have a brush that have reflective texture.
Now, lua_run.lua_run?, Lemme Explain.
A console command that allows you to run lua code on the server.
Examples:lua_run Entity(1):SetHealth(300)Set's the first player's health to 300.
lua_run zombie = ents.Create("npc_zombie") zombie:Spawn() Creates a zombie and spawns it (at the origin by default). lua_run zombie:Ignite()Sets our previously spawned zombie on fire.
BUT WAIT..
There's lua_run_cl too!
lua_run_cl?, Lemme Explain.
A console command that allows you to run lua code on the client.
For Example:lua_run_cl print(LocalPlayer():GetPos(),LocalPlayer():EyeAngles())Prints your world position and eye angles.
Alright, that was not all GMOD Developer console commands..
Maybe later i add more on the tutorial..
But Don't Worry..
I will find Even more GMOD Console commands for the Tutorial.
That's it for now, Bye!
------------------------------------------------------------------------------------------------
Updates:
Version 5 (Minor Update)
- -Added env_laser explanation.
Version 4 (Minor Update)
- -Added func_reflective_glass explanation.
Version 3 (Minor Update)
- -Added env_flare explanation
- -Added env_flare's Keyvalues, Inputs, Flags and Outputs.
Version 2.5 (Minor Update)
- -Added lua_run explanation.
- -Added lua_run_cl explanation.
Version 2 (Just Getting Started Update)
- -Added point_viewcontrol explanation.
- -Added path_track explanation.
- -Added more ent_create commands.
How to Put Player Back to Normal Sizw With Resize Mod Gmod
Source: https://gamebanana.com/tuts/12383
0 Response to "How to Put Player Back to Normal Sizw With Resize Mod Gmod"
Post a Comment